DIY Mermaid Decorations: A Fun Craft for Kids

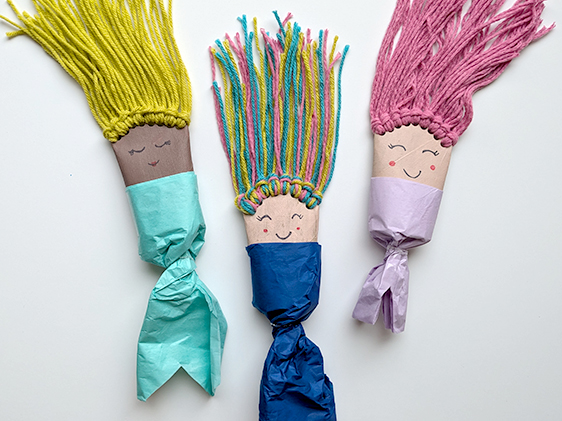
These days, my kiddo is all about mermaids, and if you're familiar with the whimsy of a "mermaid era," you know just how magical this time can be. So, today we're diving into a delightful DIY project—making enchanting mermaid decorations using simple materials you likely have around the house. Get ready to transform ordinary toilet paper rolls into magical sea characters with a splash of paint, yarn, and tissue paper. Let's swim into our craft project!
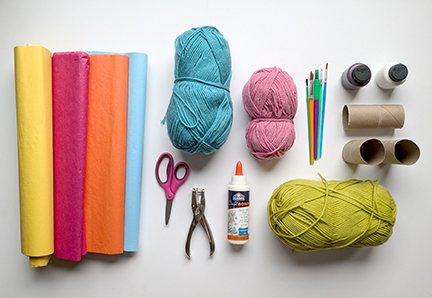
Materials Needed for Your Mermaid Craft:
Toilet paper rolls
Acrylic paint (for the face)
Yarn (for hair)
Tissue paper (for the mermaid tail)
Scissors
Hole puncher
Glue
Hair binder or tape
Markers or pens (for the face)
Step-by-Step Instructions:
1. Paint the Toilet Paper Roll: Begin by painting the toilet paper roll in the color you prefer for the mermaid’s face. This is the perfect moment to let the little ones choose their favorite colors. Allow it to dry completely before moving to the next step.
2. Shape the Hairline: Pinch the top of the roll and cut it into a slight arch shape to create the forehead of your mermaid. Punch holes along the edge of the arched top.
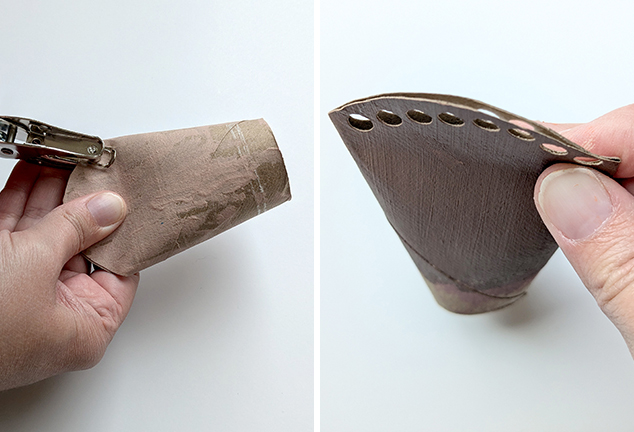
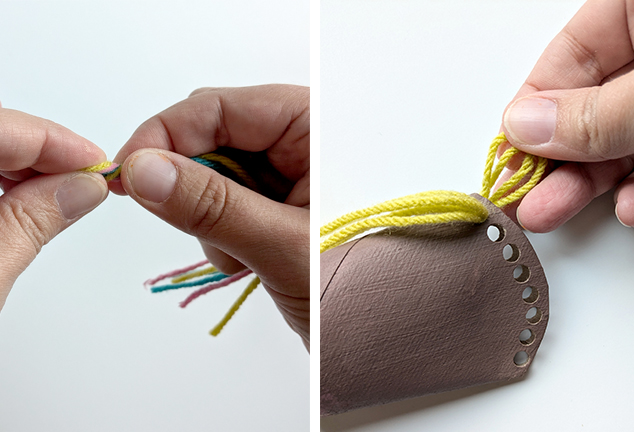
3. Add Hair with Yarn: Cut the yarn into equal lengths—using about three strands per hole works well for thicker yarn. Fold the strands in half and twist the end to make threading easier. Push the looped end through each hole from the front, pulling the yarn ends through the loop to secure them at the back. This technique ensures the front looks lush and full.
4. Create the Mermaid Tail: Choose your favorite color of tissue paper and cut or fold it to the desired length for the tail. Glue the top edge of the tissue paper around the lower half of the roll. Secure the tissue paper by rolling it around the roll and fixing it with a piece of tape.
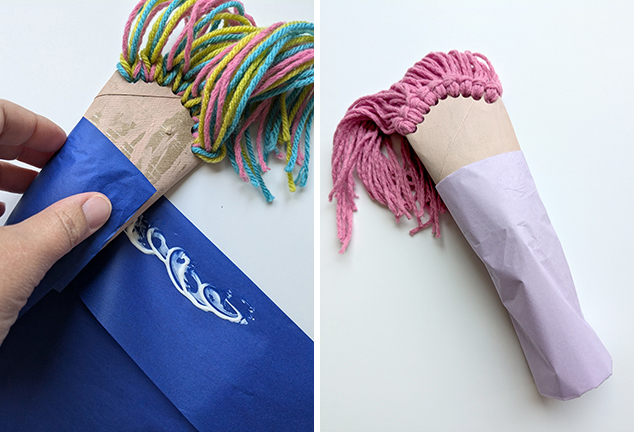
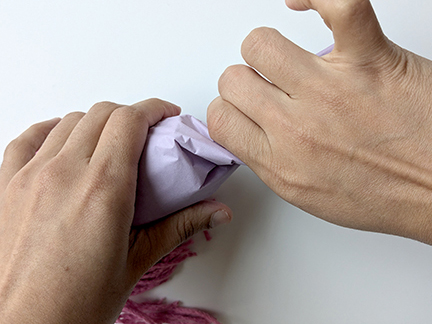
5. Form the Tail: At the base of the toilet paper roll, twist the tissue paper to form the mermaid's tail. Use a small hair binder or tie some yarn around it to keep the twist in place. For the final touch, cut an upside-down "V" at the end of the tissue paper to resemble the mermaid’s fins.
6. Draw the Face: Use markers or pens to add a sweet face to your mermaid. You can draw eyes, a smiling mouth, and even some rosy cheeks.
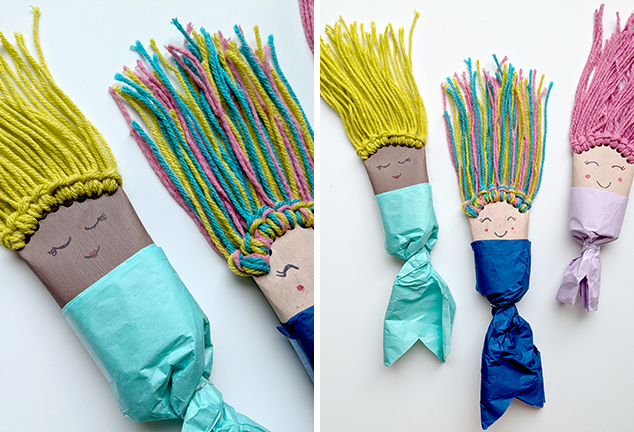
7. Finishing Touches: Now your mermaid is ready to charm! Create a whole family of mermaids with different colors and features for an entire underwater scene.
Tips for Success:
- Let kids choose their colors and assist with the yarn hair and face drawing. It's a great opportunity for them to express their creativity!
- Let kids add some stickers or other colorful decals to personalize their mermaid.
- Consider using waterproof glue if you plan to hang your mermaids outside or near water play areas.
These delightful mermaids make perfect decorations for a child’s room or can be used as props in a magical undersea play. Not only is this project a fantastic way for children to develop fine motor skills and color recognition, but it also sparks imagination and creativity.
